In Java applications, a menu is a Java Swing component that allows developers to organize items in a container. Menus are placed on a menu bar and you can have more than one menu item on your menu bar. These menu items act the same way they do in desktop applications and web sites, offering users the ability to interact with an application through a GUI or graphical user input.
The JMenu class allows programmers to create menus in their graphical applications. JMenu inherits from JAbstractButton, which itself inherits from JComponent.
We have a great list of the Best Online Courses to Learn Java if you are interested in learning how to program in a course or classroom setting.
How to Create a Menu in Java
The first step to adding a menu to your Java software is to create a menu bar, which will contain the menu(s) you create. To achieve this, simply use the JMenuBar class, as shown in the example Java code below:
JMenuBar menuBar = new JMenuBar();
To create a menu, simply create an instance of JMenu. In its constructor, you can provide the name of the menu:
JMenu menu = new JMenu(“A JMenu”);
Next, you need to add items to your list. The JMenuItem class allows programmers to add menu items to a menu in Java:
JMenuItem menuItem = new JMenuItem(“someText”);
Instead of providing text to the JMenuItem constructor, you could also provide an image icon instead. Apart from JMenuItem, developers can also use the JRadioButtonMenuItem or JCheckBoxMenuItem classes to create menu items. These classes create radio button items and check box items, respectively .
If you want to add different menu selection types ( ie radio buttons, checkboxes, or simple menu lists) for your menu items, you can separate these using the addSeparator() method of JMenu:
menu.addSeparator();
It is also worth noting that you can create sub-menus within your menus. After adding your menu items (or sub menus) to your menu, you need to add the menu to the menu bar. Then you need to add your menu bar to your frame.
menuBar.add(menu); frame.setJMenuBar(menuBar);
Below is a fully working code example that demonstrates how to add a frame, a menu bar, a menu, and menu items in Java using Swing components:
import javax.swing.*; class Menu{ public static void main(String args[]){ JFrame frame = new JFrame(); JMenuBar menuBar = new JMenuBar(); // create menu bar. JMenu menu = new JMenu(“A JMenu”); // create menu JMenuItem menuItem1 = new JMenuItem(“text”); menu.add(menuItem1); JMenuItem menuItem2 = new JMenuItem(“images”); menu.add(menuItem2); menu.addSeparator(); // line to separate different items types JRadioButtonMenuItem menuItem3 = new JRadioButtonMenuItem(“files”); menu.add(menuItem3); JRadioButtonMenuItem menuItem4 = new JRadioButtonMenuItem(“folders”); menu.add(menuItem4); menuBar.add(menu); frame.setJMenuBar(menuBar); frame.setDefaultCloseOperation(JFrame.EXIT_ON_CLOSE); frame.setSize(400,400); frame.setVisible(true); } }
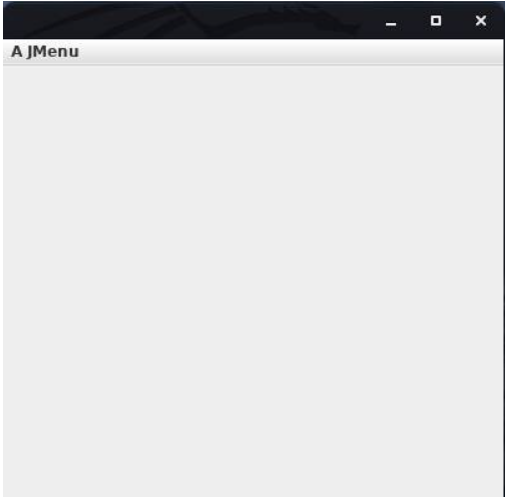
Running this code will result in the following output:
When a user presses A JMenu on the menu bar above, a list of menu items will appear.
Reading: Java Tools to Increase Productivity
Event handling with menus in Java
If you are listening for events from a JMenuItem, then you can use the same approach as when you are listening for events from a JButton, as detailed in our programming tutorial: How to Use Buttons in Java Applications.
However, if you are listening for events from a radio button, the approach is a bit different. Programmers need to add each radio button item to an instance of ButtonGroup. This ensures that your application allows only one selection for related radio button items. If they are not added to a ButtonGroup, then a user can select multiple items (which defeats the purpose of using radio buttons).
See the code example below showing how a list of fruits is added to a button group:
JRadioButtonMenuItem apple = new JRadioButtonMenuItem(“apple”); JRadioButtonMenuItem berry = new JRadioButtonMenuItem(“berry”); JRadioButtonMenuItem carrot = new JRadioButtonMenuItem(“carrot”); ButtonGroup group = new ButtonGroup(); group.add(apple); group.add(berry); group.add(carrot); apple.addActionListener(this); berry.addActionListener(this); carrot.addActionListener(this);
If you are using a JCheckBoxMenuItem, then you need to make sure that your event handling class implements ItemListener. In your event handler, you need to implement the itemStateChanged(ItemEvent e) method:
class Menu implements ItemListener{ public static void main(String args[]){ } public void itemStateChanged(ItemEvent e) { } }
See the example Java code below, which prints a message on the terminal whenever a checkbox menu item is selected or deselected:
import javax.swing.*; import java.awt.*; import java.awt.event.*; class Menu implements ItemListener{ JCheckBoxMenuItem apple; JCheckBoxMenuItem berry; JCheckBoxMenuItem carrot; Menu(){ JFrame frame = new JFrame(); JMenuBar menuBar = new JMenuBar(); JMenu menu = new JMenu(“A JMenu”); apple = new JCheckBoxMenuItem(“apple”); berry = new JCheckBoxMenuItem(“berry”); carrot = new JCheckBoxMenuItem(“carrot”); apple.addItemListener(this); berry.addItemListener(this); carrot.addItemListener(this); menu.add(apple); menu.add(berry); menu.add(carrot); menuBar.add(menu); frame.setJMenuBar(menuBar); frame.setDefaultCloseOperation(JFrame.EXIT_ON_CLOSE); frame.setSize(400,400); frame.setVisible(true); } public static void main(String args[]){ Menu menuGUI = new Menu(); } public void itemStateChanged(ItemEvent e) { Object source = e.getItemSelectable(); if (e.getStateChange() == ItemEvent.SELECTED) { if (source == apple) { System.out.println(“Apple Selected”); } else if (source == berry) { System.out.println(“Berry Selected”); } else if (source == carrot) { System.out.println(“Carrot Selected”); } } else { if (source == apple) { System.out.println(“Apple DE-Selected”); } else if (source == berry) { System.out.println(“Berry DE-Selected”); } else if (source == carrot) { System.out.println(“Carrot DE-Selected”); } } } }
Final Thoughts on Menus in Java
In this programming tutorial, you have learned how to create various menu items and how to listen for events from menus. Remember to import both the java.awt.* and java.awt.event.* modules when using event listeners in your menus/Swing applications.
read more Java programming tutorials and software development tips.
